Building Android apps with Jenkins: release management
The previous blog post of this series discusses what I think makes CI/CD for mobile app development a unique kind of animal, and my first steps in building Android apps with Jenkins. We were left with a working declarative pipeline per branch, one Docker image per branch too, and an application binary ready to be deployed. Ready?
Release management
I was able to find the binaries in the workspace in a matter of seconds, but there is no release available, only binaries. This means there are some manual steps required to create a versioned release that we can deliver to test users, for example.
We can manually create a release within GitHub and then copy-paste the binaries from Jenkins' artifact archives to the GitHub release page. We can also do the same for the Google Play Store. However, this approach is neither efficient nor error-proof.
In regards to having a release on the Github repository at the same time as on Google Play, it really depends on the app and its audience. For the purposes of this article, let’s assume it’s okay.
Prerequisites
To automate the release process, we need to determine the criteria for a version number, how to update the version number, and what constitutes a release. We can use the "Semantic Version" Gradle plugin, which has a strict set of rules to guide us. This plugin allows us to increment the patch, minor, or major version using Gradle commands. We can also use classifiers such as snapshot, beta, alpha, or any other version classifier to define a version name.
version = "1.1.11"

apply plugin: "com.dipien.android.semantic-version"
I then searched for a Jenkins plugin that would create a GitHub release. As the saying goes,
There’s a plugin for that
but unfortunately, I couldn’t find one that meets my needs. While there is a plugin called Git Changelog that can merge commit messages to produce a readable version of the changes, it doesn’t create the release.
GitHub release
If you want to stay on the Jenkins side, there isn’t a plugin this time.
However, there are various ways to create a release.
You can use the GitHub REST API or the gh command, which can handle all the heavy lifting for us.
Therefore, let’s go back to the drawing board and add the command to our Docker image.
# Install GitHub command line tool
ENV GITHUB_TOKEN $GITHUB_TOKEN
RUN curl -fsSL https://cli.github.com/packages/githubcli-archive-keyring.gpg | dd of=/usr/share/keyrings/githubcli-archive-keyring.gpg && \
    chmod go+r /usr/share/keyrings/githubcli-archive-keyring.gpg && \
    echo "deb [arch=$(dpkg --print-architecture) signed-by=/usr/share/keyrings/githubcli-archive-keyring.gpg] https://cli.github.com/packages stable main" | tee /etc/apt/sources.list.d/github-cli.list > /dev/null && \
    apt update && apt install -y --no-install-recommends gh
Once that’s done, we need to use GitHub App authentication to enable gh to use our credentials.
To do this, we have to install the GitHub Branch Source plugin and then create a GitHub Application.
The existing documentation on GitHub is exactly what we need, so a link to this should suffice. The only fields you need to prepare and fill out at this stage are:
-
Github App name - i.e.
Jenkins-<team name> -
Homepage URL - your company’s domain or a GitHub repository
-
Webhook URL - your jenkins instance, for example,
https://<jenkins-host>/github-webhook/
At that moment, I queried GitHub using gh to determine
whether the release already existed, and create it if not.
My choice of how to create the release was entirely arbitrary: I decided to create a release when the version ended with "RELEASE", a draft release when there was no suffix, and a pre-release when the version ended with "ALPHA" or "BETA".
suffix=$(echo $versionName | sed 's/.*-//')
case $suffix in
    ALPHA|BETA)
        echo "Time to do a prerelease"
        GH_OPTS="$GH_OPTS-p"
        ;;
    SNAPSHOT)
        echo "This is a snapshot, we won't release anything"
        GH_OPTS="$GH_OPTS DO_NOT_RELEASE"
        ;;
    RELEASE)
        echo "This a real release, so no need to use -d or -p";;
    *)
        echo "Unknown suffix \"$suffix\", so we'll do a draft release"
        GH_OPTS="$GH_OPTS-d"
        ;;
esac
This is good enough for my use case.
The gh command does a nice job of preparing a release change log, so I’m relying on it.
If we’re not building on the main branch, the release is not finalized, so I can still tidy it up later.
It’s great to be able to create a release as soon as it’s required, even when it’s not necessary…
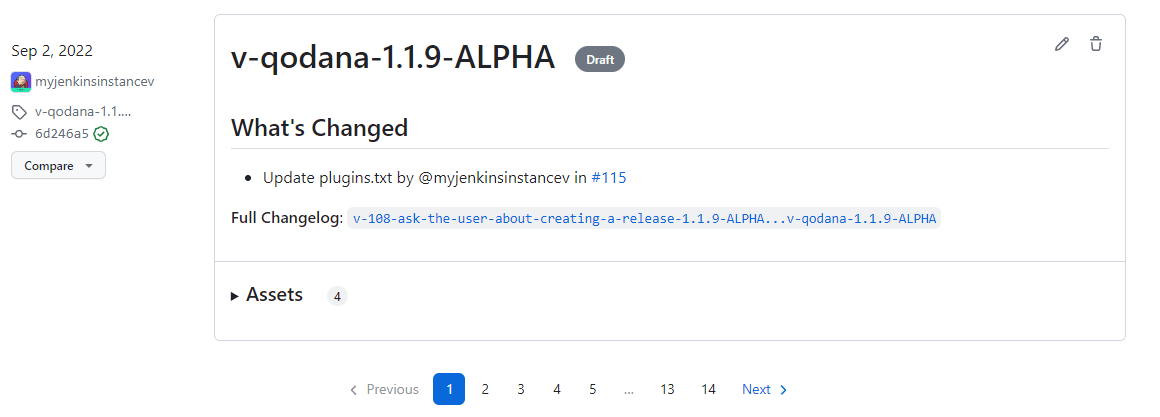
It looks like I may have gone a little too far with the automatic release creation, don’t you think?
Now, what about using that workflow to create a release on the Play Store?
Google Play Store release
The version is already handled by the semantic plugin, and the release notes are almost ready to go.
Now, we just need to find the right plugin to push our app to the Google Play Store.
Luckily, we have a plugin for that, called com.github.triplet.play.
This time, it’s a Gradle plugin instead of a Jenkins plugin.
The first step to getting your app on the Play Store is to pay the $25 developer account fee. After that, you need to register your app, import the EULA (there are free websites to generate that), upload the required paperwork, and then upload the signed app. Since the app is not signed yet, we’ll need to do that first.
Signing the app from the command line
There are different ways to sign your app - from the command line using apksigner for APKs, jarsigner for app bundles, or you can configure Gradle to sign it during the build.
In any case, you need to generate a private key using keytool before signing the app.
keytool -genkey -v -keystore my-release-key.jks -keyalg RSA -validity 10000 -alias my-aliasLet’s quickly review how to sign an apk:
-
Align the unsigned APK using
zipalign:zipalign -v -p 4 my-app-unsigned.apk my-app-unsigned-aligned.apkzipalignensures that all uncompressed data starts with a particular byte alignment relative to the start of the file, which may reduce the amount of RAM consumed by an app. -
Sign your APK with your previously generated private key using
apksigner:apksigner sign --ks my-release-key.jks --out my-app-release.apk my-app-unsigned-aligned.apkThis example outputs the signed APK at
my-app-release.apkafter signing it with a private key and certificate, that are stored in a single KeyStore file:my-release-key.jks.
Now, let’s discuss how to sign an application bundle (located in app/build/outputs/bundle/debug) thanks to Gradle.
jarsigner -verbose -sigalg SHA256withRSA -keystore ../../../../../my-release-key.jks app-debug.aab my-aliasSigning the app from Gradle
Open the module-level build.gradle file and add the signingConfigs {} block with entries for storeFile, storePassword, keyAlias and keyPassword.
Then, pass that object to the signingConfig property in your build type.
For example:
 signingConfigs {
        release {
            // You need to specify either an absolute path or include the
            // keystore file in the same directory as the build.gradle file.
            storeFile file("my-release-key.jks")
            storePassword "password"
            keyAlias "my-alias"
            keyPassword "password"
        }
    }

    buildTypes {
        release {
            minifyEnabled false
            proguardFiles getDefaultProguardFile('proguard-android-optimize.txt'), 'proguard-rules.pro'
            signingConfig signingConfigs.release
        }
    }
From now on, when you create the bundle with Gradle, it will be signed, self-signed, which is not what we’re aiming for. We still need to upload the icon, a summary, screenshots, banners, and other boilerplate content… The next step is to create a GCP project.
Creating a GCP project
You have to enable the Android Publisher API for that project.
Then, you have to link your Google Play developer account to the GCP project.
After this, you need to create a service account.
Then create a key.
To set up the necessary credentials for publishing our app to the Play Store, we’ll need to create an environment variable in Jenkins. To do this, we first need to install the Environment Injector plugin. Once that’s done, we can grant the necessary permissions to our service account so that it can publish the app on our behalf.
And we’re finally ready to publish our app thanks to Gradle on Jenkins.
Publishing the app
The gradlew tasks group publishing tells us we have a publishBundle task that uploads App Bundle for all variants.
./gradlew tasks --group publishing

> Task :tasks

------------------------------------------------------------
Tasks runnable from root project 'My First Built by Jenkins Applications'
------------------------------------------------------------

Publishing tasks
----------------
[...]
publishBundle - Uploads App Bundle for all variants.
   See https://github.com/Triple-T/gradle-play-publisher#publishing-an-app-bundle
[...]
BUILD SUCCESSFUL in 1s
1 actionable task: 1 executed
As we did not store the generated jks file in the repo, we have to use a variable to hold the value.
On your machine, it would work with something like:
export ANDROID_PUBLISHER_CREDENTIALS=`cat *json`On Jenkins, we will create a secret.
The secret is now available under the android-publisher-credentials key.
The triplet documentation tells us that we can set up a configuration in the build.gradle file like:
play {
    // Overrides defaults
    track.set("internal")
    updatePriority.set(2)
    releaseStatus.set(ReleaseStatus.DRAFT)
    // ...
}
Gradle Play Publisher supports uploading both the App Bundle and APK, and can promote those artifacts to different tracks. You can customize how your artifacts are published using several options:
-
track: The target stage for an artifact, such asinternal/alpha/beta/productionor any custom track.-
Defaults to internal
-
-
releaseStatus: The type of release, such asReleaseStatus.COMPLETED,ReleaseStatus.DRAFT,ReleaseStatus.HALTED, orReleaseStatus.IN_PROGRESS.-
Defaults to
ReleaseStatus.COMPLETED
-
-
userFraction: The percentage of users who will receive a staged release.-
This is only applicable where
releaseStatus=[IN_PROGRESS/HALTED]. -
defaults to
0.1(10%)
-
-
updatePriority: Sets the update priority for a new release. Refer to Google’s documentation for more information.-
Defaults to the API value
-
Furthermore, according to the documentation, you need to supply a release notes file.
To do so, you need to add a file under src/[sourceSet]/play/release-notes/[language]/[track].txt.
Here, sourceSet is a full variant name, language is one of the Play Store supported codes, and track is the channel you want these release notes to apply to.
If no channel is specified, the default channel will be used.
As an example, let’s assume you have these two different release notes:
src/main/play/release-notes/en-US/default.txt
.../beta.txt
When you publish to the beta channel, the beta.txt release notes will be uploaded.
For any other channel, default.txt will be uploaded.
For our use case, we’ll use the internal track, and start from the release notes generated via the gh tool to produce a shorter version, limited to 500 characters as specified by Google.
gh release view v${versionName} | grep -A 500 "\-\-" | grep -v "\-\-" | sed 's/http.*[/]/#/' > $releaseNotesDir/internal.txt
    content=$(cat < "$releaseNotesDir/internal.txt" && echo .) && content=${content%.} && printf %s "${content:0:500}" > "$releaseNotesDir/internal.txt"
Have we completed all the necessary steps?
We now have an Android application that builds, has undergone static analysis, and is automatically pushed to both GitHub and the Google Play Store. However, there is still much left to cover, which we will explore in upcoming episodes.
About the authors

Bruno is a father of two, husband of one, geek in denial, beekeeper, permie and a Developer Relations for the Jenkins project.
He’s been tinkering with continuous integration and continuous deployment since 2013, with various products/tools/platforms (Gitlab CI, Circle CI, Travis CI, Shippable, Github Actions, …), mostly for mobile and embedded development.
He’s passionate about embedded platforms, the ARM&RISC-V ecosystems, and Edge Computing.
His main goal is to add FOSS projects and platforms to the ARM&RISC-V architectures, so that they become as boring as X86_64.
He is also the creator of miniJen, the smallest multi-cpu architectures Jenkins instance known to mankind.


Kevin Martens is the Documentation officer for the Jenkins project, helping to lead the Docs SIG and host Jenkins documentation office hours. Although a more "recent" member of the Jenkins community, he has helped create and maintain the Contributor Spotlight, regularly creates the LTS changelog and upgrade guides, and wants to help make Jenkins documentation more accessible to all users.
