Declarative Pipeline: Publishing HTML Reports

| This is a guest post by Liam Newman, Technical Evangelist at CloudBees. |
Declare Your Pipelines! Declarative Pipeline 1.0 is here! This is the second post in a series showing some of the cool features of Declarative Pipeline.
In the
previous blog post,
we created a simple Declarative Pipeline.
In this blog post, we’ll go back and look at the Scripted Pipeline for the
Publishing HTML Reports in Pipeline blog post.
We’ll convert that Pipeline to Declarative syntax (including properties), go
into more detail on the post section, and then we’ll use the agent
directive to switch our Pipeline to run in Docker.
Setup
For this post, I’m going to use the
blog/add-declarative/html
branch of
my fork of the
hermann project.
I’ve set up a Multibranch Pipeline and pointed it at my repository
the same as did it previous post.
Also the same as before, I’ve set this Pipeline’s Git configuration to
automatically "Clean after checkout".
This time we already have a Pipeline checked in. I’ll run it a few times to get a baseline.
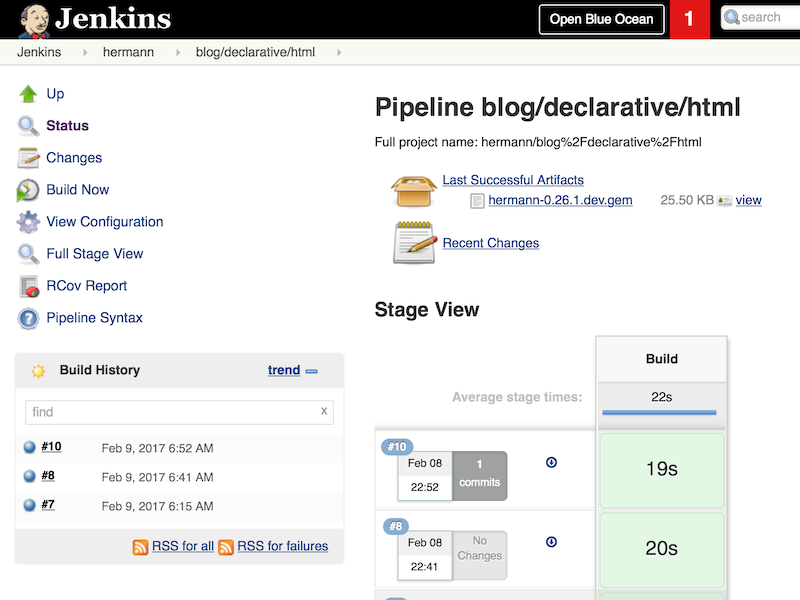
Converting to Declarative
Let’s start by converting the Scripted Pipeline straight to Declarative.
pipeline {
  agent any (1) (2)
  options {
    // Keep the 10 most recent builds
    buildDiscarder(logRotator(numToKeepStr:'10')) (3)
  }
  stages {
    stage ('Build') { (4)
      steps {
        // install required gems
        sh 'bundle install'

        // build and run tests with coverage
        sh 'bundle exec rake build spec'

        // Archive the built artifacts
        archive includes: 'pkg/*.gem'

        // publish html
        publishHTML target: [
            allowMissing: false,
            alwaysLinkToLastBuild: false,
            keepAll: true,
            reportDir: 'coverage',
            reportFiles: 'index.html',
            reportName: 'RCov Report'
          ]
      }
    }
  }
}| 1 | Select where to run this Pipeline, in this case "any" agent, regardless of label. |
| 2 | Declarative automatically performs a checkout of source code on the agent,
whereas Scripted Pipeline users must explicitly call checkout scm. |
| 3 | Set the Pipeline option to preserve the ten most recent runs. This overrides the default behavior from the Multibranch parent of this Pipeline. |
| 4 | Run the "Build" stage. |
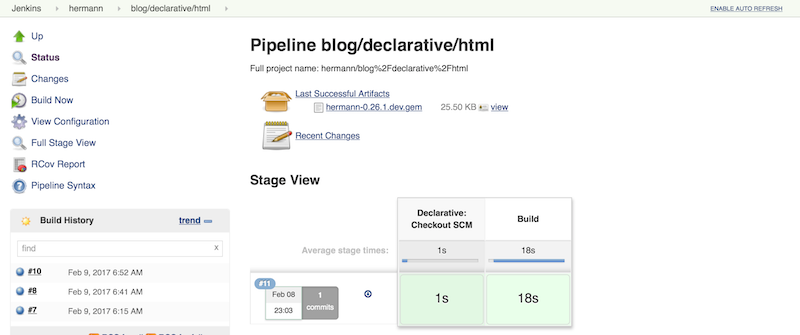
Now that we have this Pipeline in Declarative form, let’s take a minute to do a
little clean up. We’ll split out the bundle actions a little more and move
steps into logically grouped stages. Rather than having one monolithic "Build"
stage, we’ll have details for each stage. As long as we’re prettying things
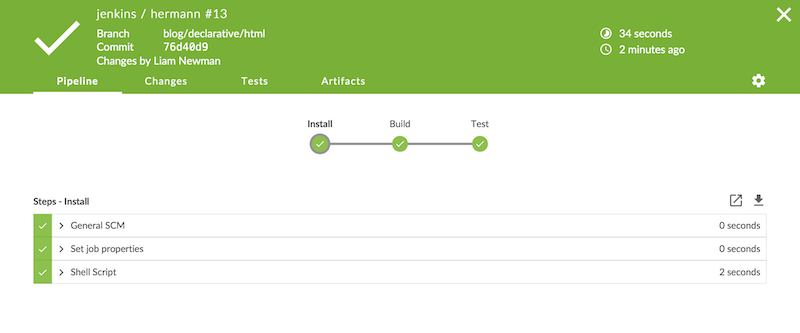
up, let’s switch to using Blue Ocean to view our
builds, as well.
pipeline {
  agent any
  options {
    // Keep the 10 most recent builds
    buildDiscarder(logRotator(numToKeepStr:'10'))
  }
  stages {
    stage ('Install') {
      steps {
        // install required gems
        sh 'bundle install'
      }
    }
    stage ('Build') {
      steps {
        // build
        sh 'bundle exec rake build'

        // Archive the built artifacts
        archive includes: 'pkg/*.gem'
      }
    }
    stage ('Test') {
      steps {
        // run tests with coverage
        sh 'bundle exec rake spec'

        // publish html
        publishHTML target: [
            allowMissing: false,
            alwaysLinkToLastBuild: false,
            keepAll: true,
            reportDir: 'coverage',
            reportFiles: 'index.html',
            reportName: 'RCov Report'
          ]
      }
    }
  }
}
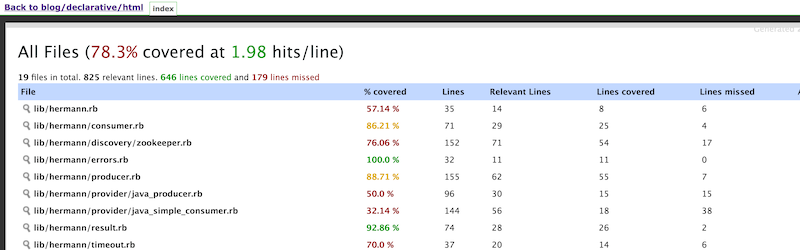
Using post sections
This looks pretty good, but if we think about it
the archive and publishHTML steps are really post-stage actions.
They should only occur when the rest of their stage succeeds.
As our Pipeline gets more complex we might need to add actions that always happen
even if a stage or the Pipeline as a whole fail.
In Scripted Pipeline, we would use try-catch-finally,
but we cannot do that in Declarative.
One of the defining features of the Declarative Pipeline
is that it does not allow script-based control structures
such as for loops, if-then-else blocks, or try-catch-finally blocks.
Of course, internally Step implementations can still contain whatever conditional logic they want,
but the Declarative Pipeline cannot.
Instead of free-form conditional logic,
Declarative Pipeline provides a set of Pipeline-specific controls:
when directives, which we’ll look at in
a later blog post in this series, control whether to execute the steps in a stage,
and
post sections
control which actions to take based on result of a single stage
or a whole Pipeline. post supports a number of
run conditions,
including always (execute no matter what) and changed
(execute when the result differs from previous run).
We’ll use success to run archive and publishHTML when their respective stages complete.
We’ll also use an always block with a placeholder for sending notifications,
which I’ll implement in the next blog post.
pipeline {
  agent any
  options {
    // Only keep the 10 most recent builds
    buildDiscarder(logRotator(numToKeepStr:'10'))
  }
  stages {
    stage ('Install') {
      steps {
        // install required gems
        sh 'bundle install'
      }
    }
    stage ('Build') {
      steps {
        // build
        sh 'bundle exec rake build'
      }

      post {
        success {
          // Archive the built artifacts
          archive includes: 'pkg/*.gem'
        }
      }
    }
    stage ('Test') {
      steps {
        // run tests with coverage
        sh 'bundle exec rake spec'
      }

      post {
        success {
          // publish html
          publishHTML target: [
              allowMissing: false,
              alwaysLinkToLastBuild: false,
              keepAll: true,
              reportDir: 'coverage',
              reportFiles: 'index.html',
              reportName: 'RCov Report'
            ]
        }
      }
    }
  }
  post {
    always {
      echo "Send notifications for result: ${currentBuild.result}"
    }
  }
}
Switching agent to run in Docker
agent can actually accept
several other parameters instead of any.
We could filter on label "some-label", for example,
which would be the equivalent of node ('some-label') in Scripted Pipeline.
However, agent also lets us just as easily switch to using a Docker container,
which replaces a more complicated set of changes in Scripted Pipeline:
pipeline {
  agent {
    // Use docker container
    docker {
      image 'ruby:2.3'
    }
  }
  /* ... unchanged ... */
}
If I needed to, I could add a label filter under docker
to select a node to host the Docker container.
I already have Docker available on all my agents, so I don’t need label -
this works as is.
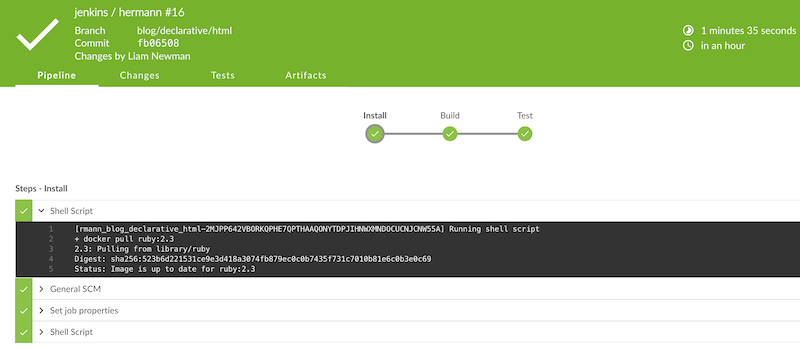
As you can see below, the Docker container spins up at the start of the run
and the pipeline runs inside it. Simple!
Conclusion
At first glance, the Declarative Pipeline’s removal of control structures seems
like it would be too constrictive. However, it replaces those structures with
facilities like the post section, that give us reasonable control over the
flow of our Pipeline while still improving readability and maintainability.
In the next blog post, we’ll add notifications to this pipeline
and look at how to use Shared Libraries with Declarative
Pipeline to share code and keep Pipelines easy to understand.
About the author